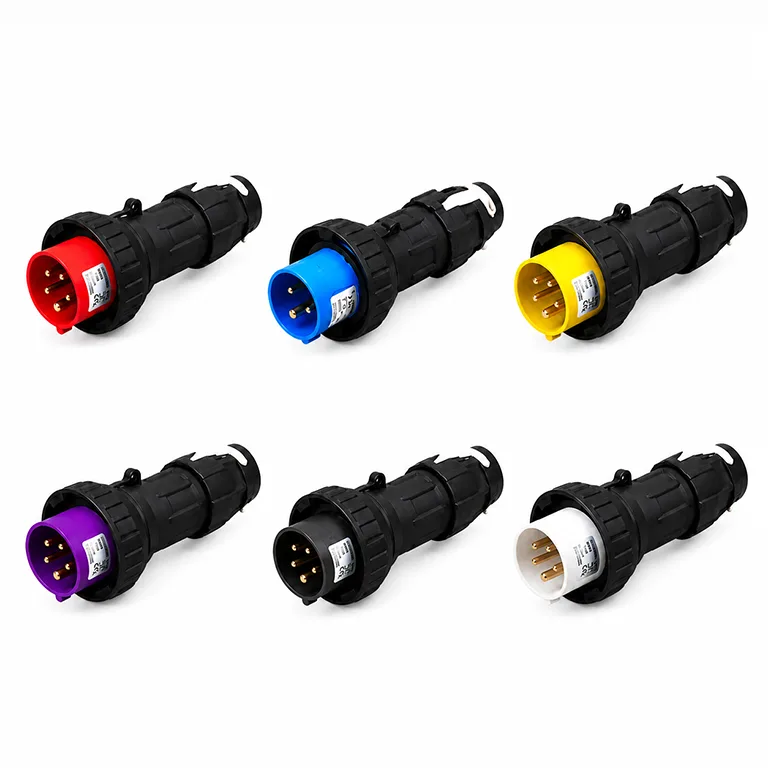
Ex 16A plugs – 2-pin | 3-pin | 4-pin | 5-pin
ATEX marking
 II 2 G Ex db eb IIC T5 Gb
II 2 D Ex tb IIIC T80°C Db
Technical specifications
Downloads

A comparison with brands from Germany, Italy and Croatia revealed an average price difference of 30 per cent, with no apparent difference in build quality.

We top up our stock on an ongoing basis to ensure that the most popular variants are available straight away.

We design and manufacture socket sets and distribution boards for Ex zones, tailored to the requirements of the installation.

Are our products of high quality? Book a visit to our demo centre and compare them with solutions from other companies.
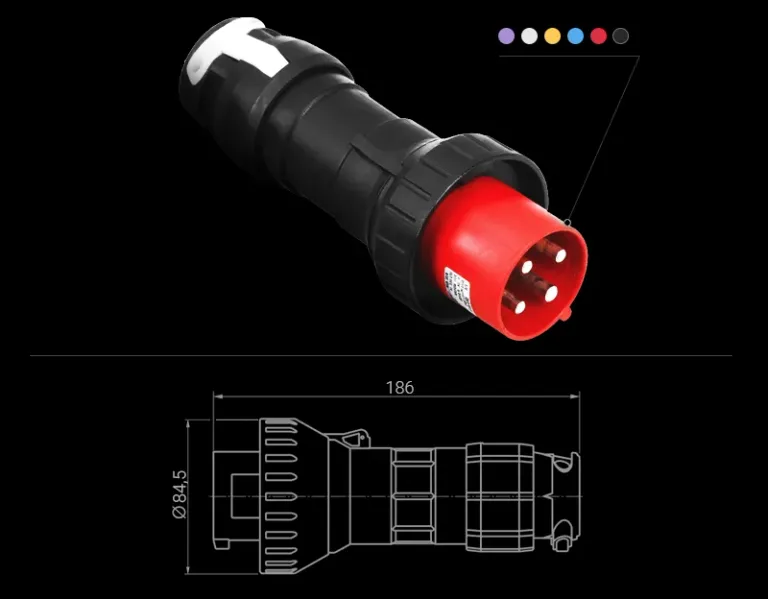
Ex SOCKETS AND PLUGS
Main electrical parameters
CURRENT | POLES | AC/DC PART NO. | AC/DC VOLTAGE | DATA SHEET |
|---|---|---|---|---|
16A | 2P | HSP1P 16 AC25 2P PLG / HSP1P 16 DC25 2P LPG HSP1P 16 AC50 2P W-SCT / HSP1P 16 DC50 2P W-SCT | 🟣 20~25V AC / 20~25V DC ⚪ 36~50V AC / 36~50V DC | Download |
16A | 3P (2P + PE) | HSP1P 16 AC25 3P PLG / HSP1P 16 DC25 3P PLG HSP1P 16 AC50 3P PLG / HSP1P 16 DC50 3P PLG HSP1P 16 AC130 3P PLG HSP1P 16 AC250 3P PLG / HSP1P 16 DC250 3P PLG | 🟣 20~25V AC / 20~25V DC ⚪ 36~50V AC / 36~50V DC 🟡 110~130V AC 🔵 200~250V / 50~250VAC | Download |
16A | 3P (1P + N + PE) | HSP1P 16 AC25 3P PLG HSP1P 16 AC50 3P PLG HSP1P 16 AC130 3P PLG | 🟣 20~25V AC ⚪ 36~50V AC 🟡 110~130V AC | Download |
16A | 4P (3P + PE) | HSP1P 16 AC250 4P PLG HSP1P 16 AC415 4P PLG HSP1P 16 AC500 4P PLG HSP1P 16 AC690 4P PLG | 🔵 200~250V AC 🔴 380~415V AC ◯ 480~500V AC ◯ 600~690V AC | Download |
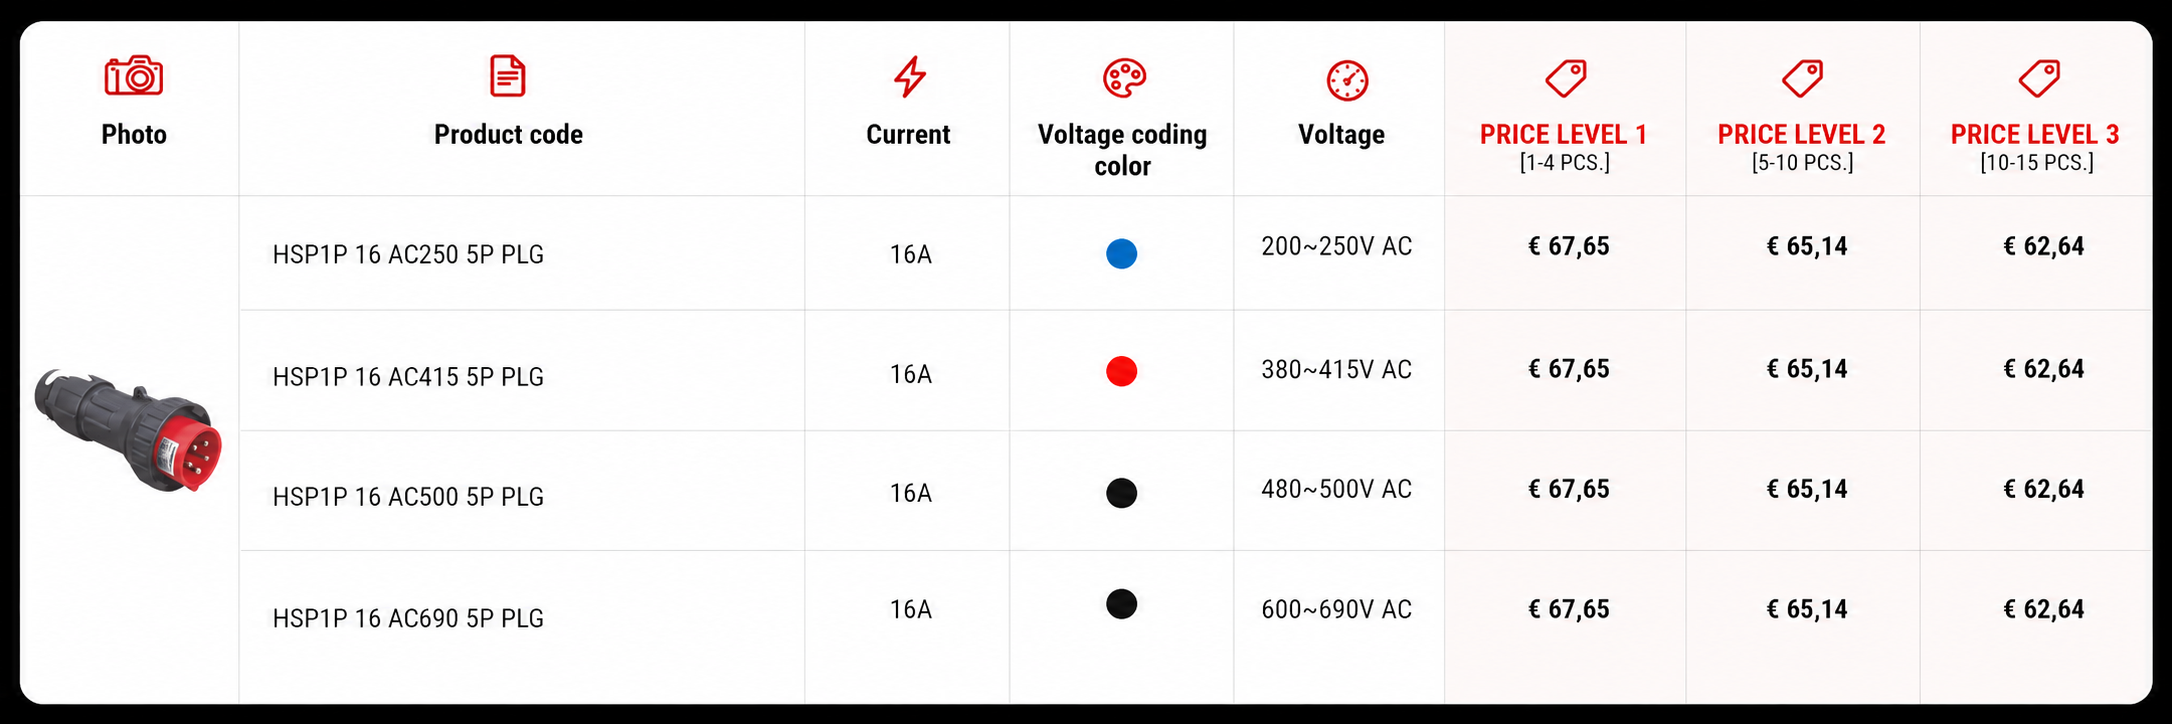
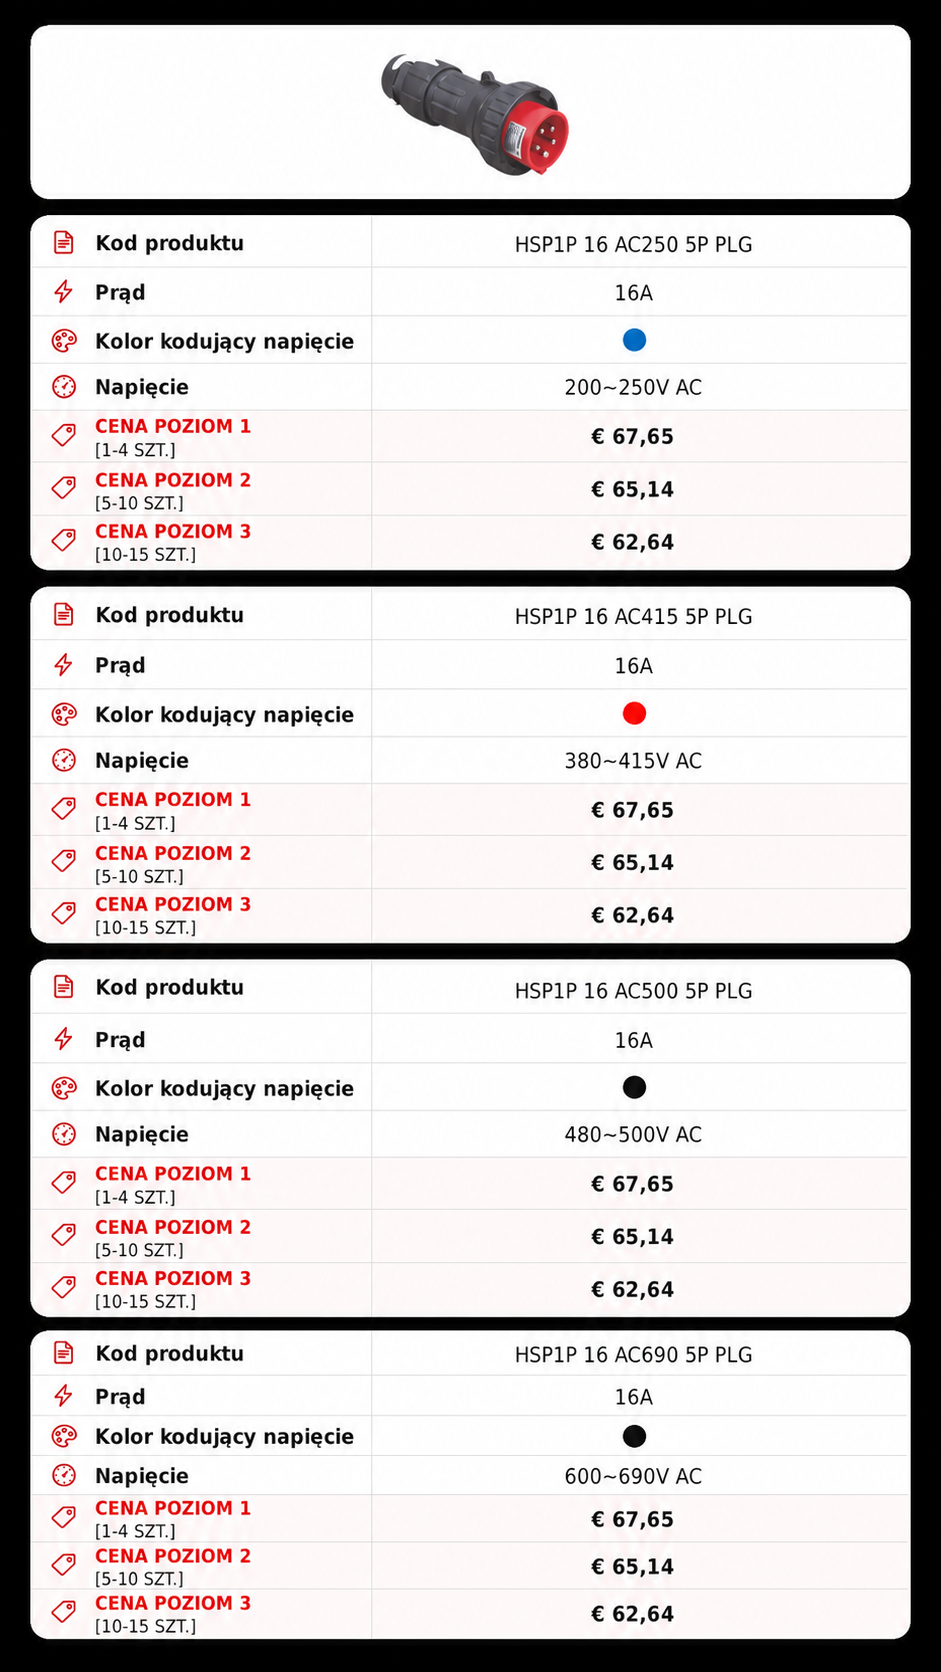
16A | 5P (3P + N + PE) | HSP1P 16 AC250 5P PLG HSP1P 16 AC415 5P PLG HSP1P 16 AC500 5P PLG HSP1P 16 AC690 5P PLG | 🔵 200~250V AC 🔴 380~415V AC ◯ 480~500V AC ◯ 600~690V AC | Download |
Ambient temperature: -45°C to +65°C | Degree of protection: IP66 | Cable entry: M25 cable gland + M25 blanking plug Integrated switch: ON / OFF switching by rotating the plug in the socket |
||||
AC/DC PART NO. | POLES | AC/DC VOLTAGE |
|---|---|---|
HSP1P 16 AC25 2P W-SCT / HSP1P 16 DC25 2P W-SCT HSP1P 16 AC50 2P W-SCT / HSP1P 16 DC50 2P W-SCT | 2P | 🟣 20~25V AC / 20~25V DC ⚪ 36~50V AC / 36~50V DC |
| PDFDownload | ||
HSP1P 16 AC25 3P W-SCT / HSP1P 16 DC25 3P W-SCT HSP1P 16 AC50 3P W-SCT / HSP1P 16 DC50 3P W-SCT HSP1P 16 AC130 3P W-SCT HSP1P 16 AC250 3P W-SCT / HSP1P 16 DC250 3P W-SCT | 3P (2P + PE) | 🟣 20~25V AC / 20~25V DC ⚪ 36~50V AC / 36~50V DC 🟡 110~130V AC 🔵 200~250V AC / 50~250V |
| PDFPobierz kartę katalogową | ||
HSP1P 16 AC25 3P W-SCT HSP1P 16 AC50 3P W-SCT HSP1P 16 AC130 3P W-SCT | 3P (1P + N + PE) | 🟣 20~25V AC ⚪ 36~50V AC 🟡 110~130V AC |
| PDFDownload | ||
HSP1P 16 AC250 4P W-SCT HSP1P 16 AC415 4P W-SCT HSP1P 16 AC500 4P W-SCT HSP1P 16 AC690 4P W-SCT | 4P (3P + PE) | 🔵 200~250V AC 🔴 380~415V AC ◯ 480~500V AC ◯ 600~690V AC |
| PDFDownload | ||
HSP1P 16 AC250 5P W-SCT HSP1P 16 AC415 5P W-SCT HSP1P 16 AC500 5P W-SCT HSP1P 16 AC690 5P W-SCT | 5P (3P + N + PE) | 🔵 200~250V AC 🔴 380~415V AC ◯ 480~500V AC ◯ 600~690V AC |
| PDFDownload | ||
Ambient temperature: -45°C to +65°C | Degree of protection: IP66 | Cable entry: M25 cable gland + M25 blanking plug Integrated switch: ON / OFF switching by rotating the plug in the socket |
||
CHECK PRICES / BECOME A DISTRIBUTOR
Price list for Ex sockets and plugs
Skrzynki łączeniowe
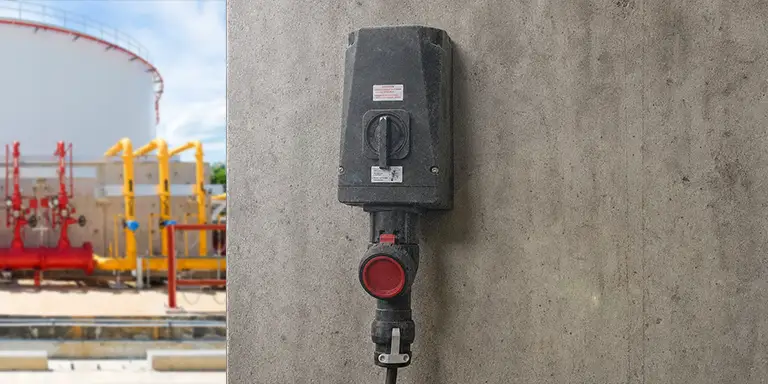
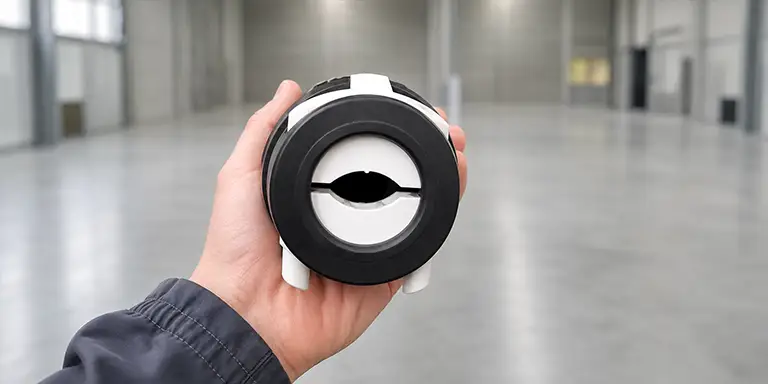
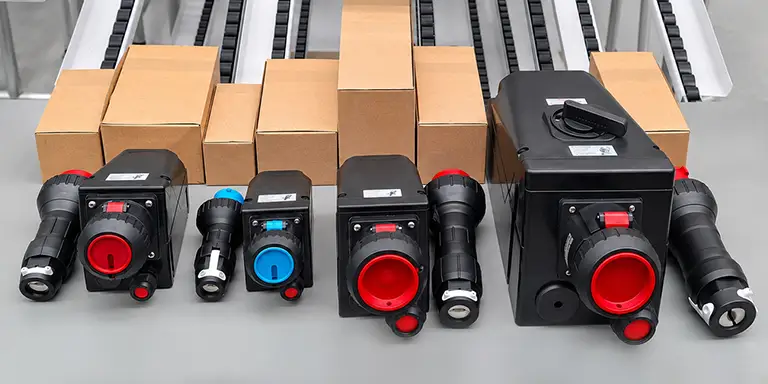
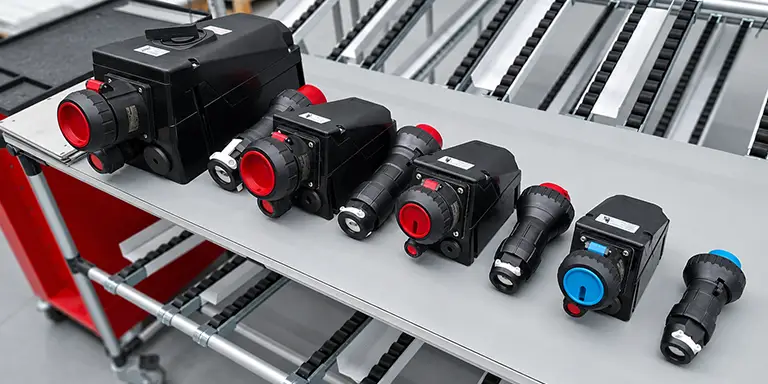
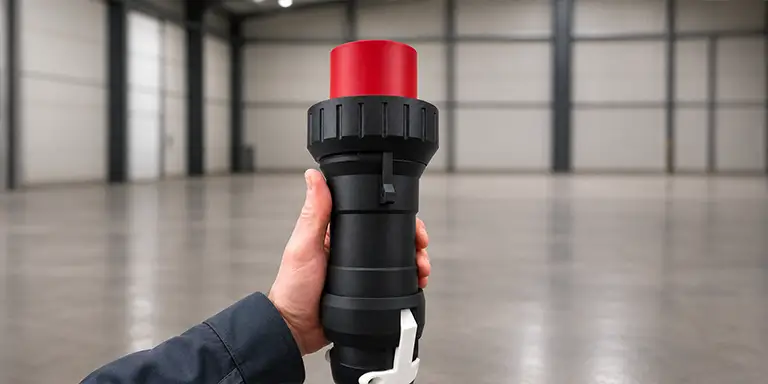
Safe connection and disconnection of the HSP1P plug
Step 0 – Pre-use check
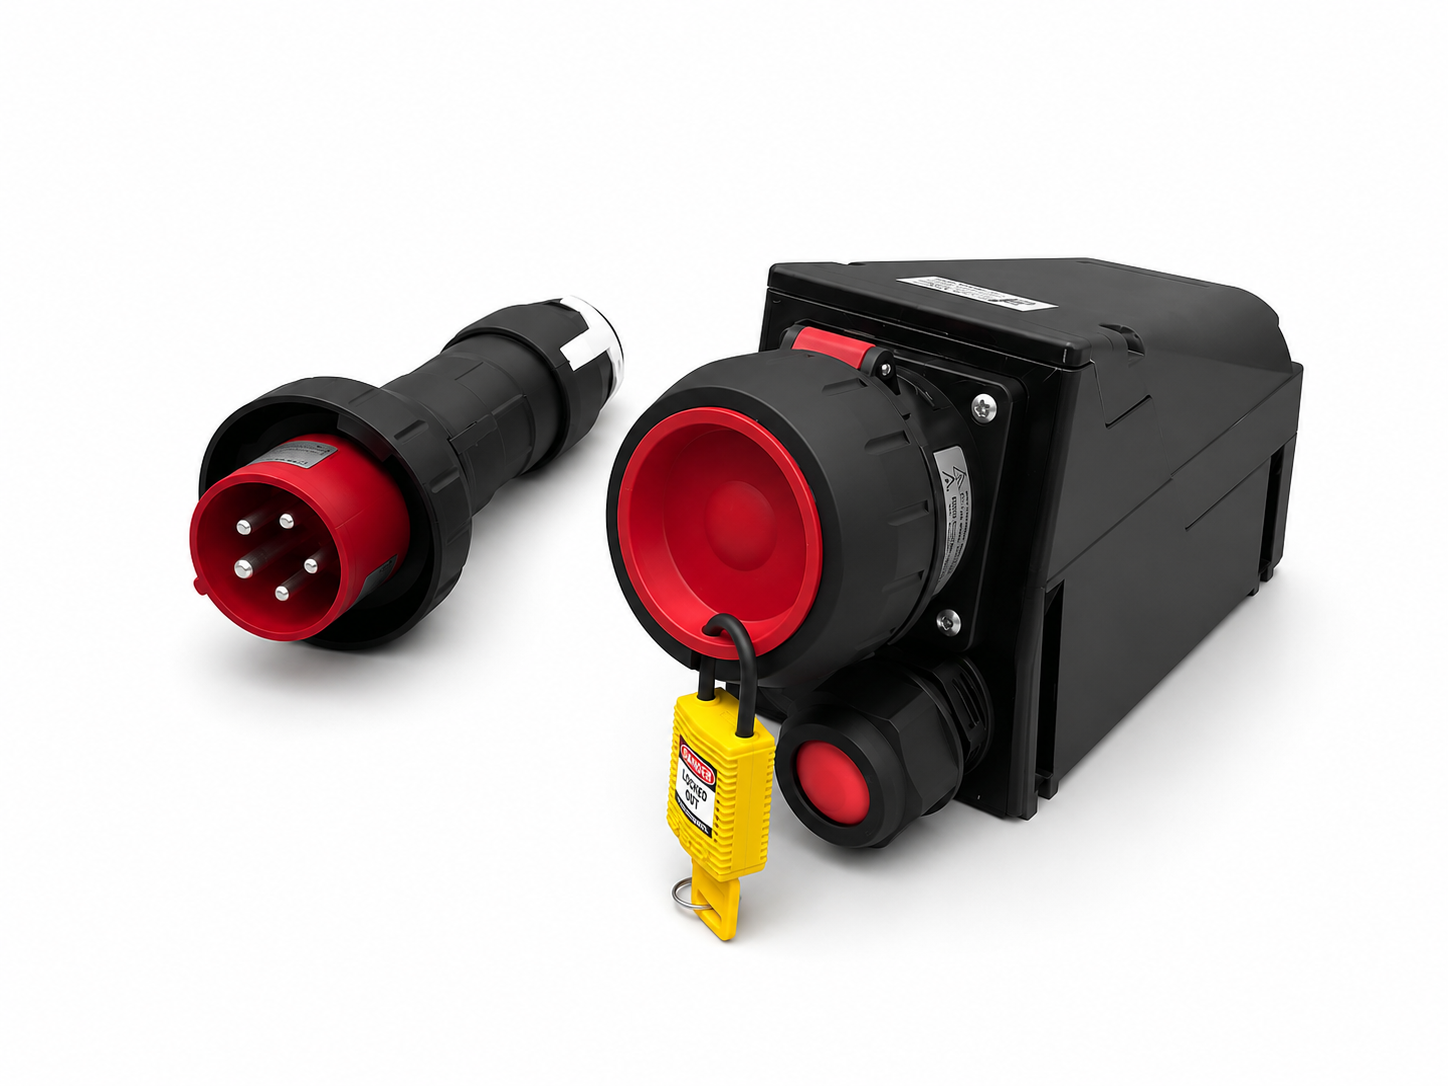
To ensure an appropriate level of safety in a potentially explosive atmosphere, access to the socket may be restricted by a padlock. A built-in switch with a mechanical lock ensures that the plug can only be inserted or removed when the socket contacts are de-energised.
In the 16 A and 32 A versions, the switch is operated by turning the plug.
Step 1 – opening the protective cover
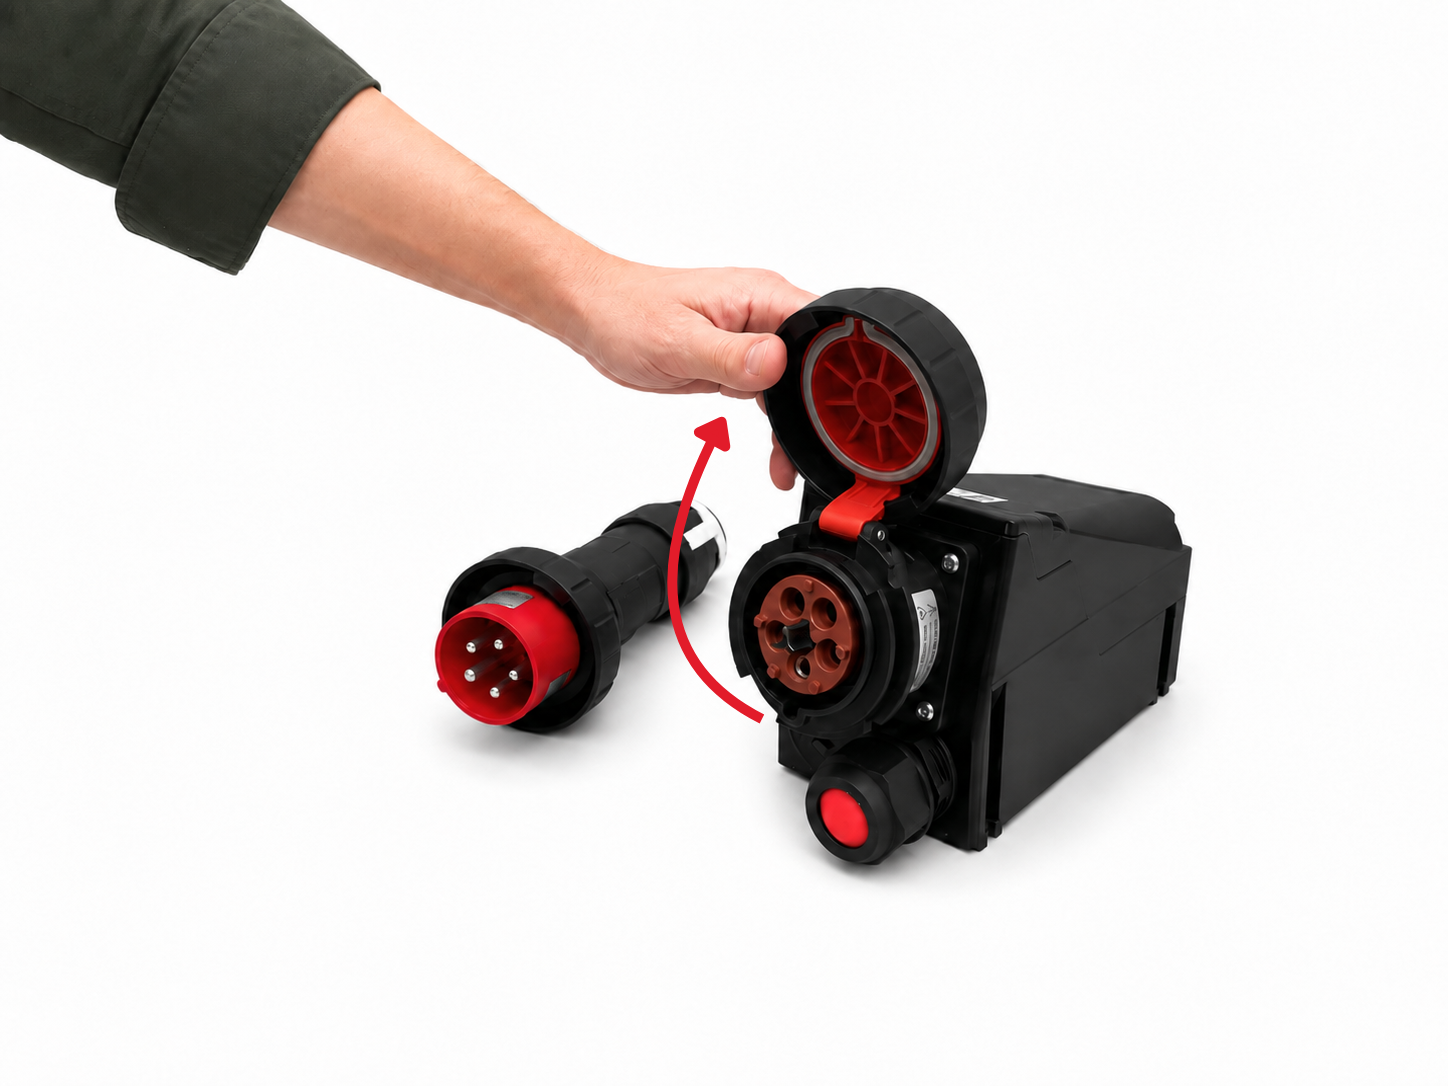
Unscrew the cover and tilt it upwards. The cover, together with the seal, protects the unused socket from dust and water, ensuring an IP66 rating. The kit is protected against incorrect connection and the use of an incompatible non-Ex plug. Mechanical coding ensures that only compatible components can be connected, whilst the distinctive colour makes it easy to identify their rated voltage. Once you have finished using the socket, tighten the cover securely.
Step 2 – fitting the plug
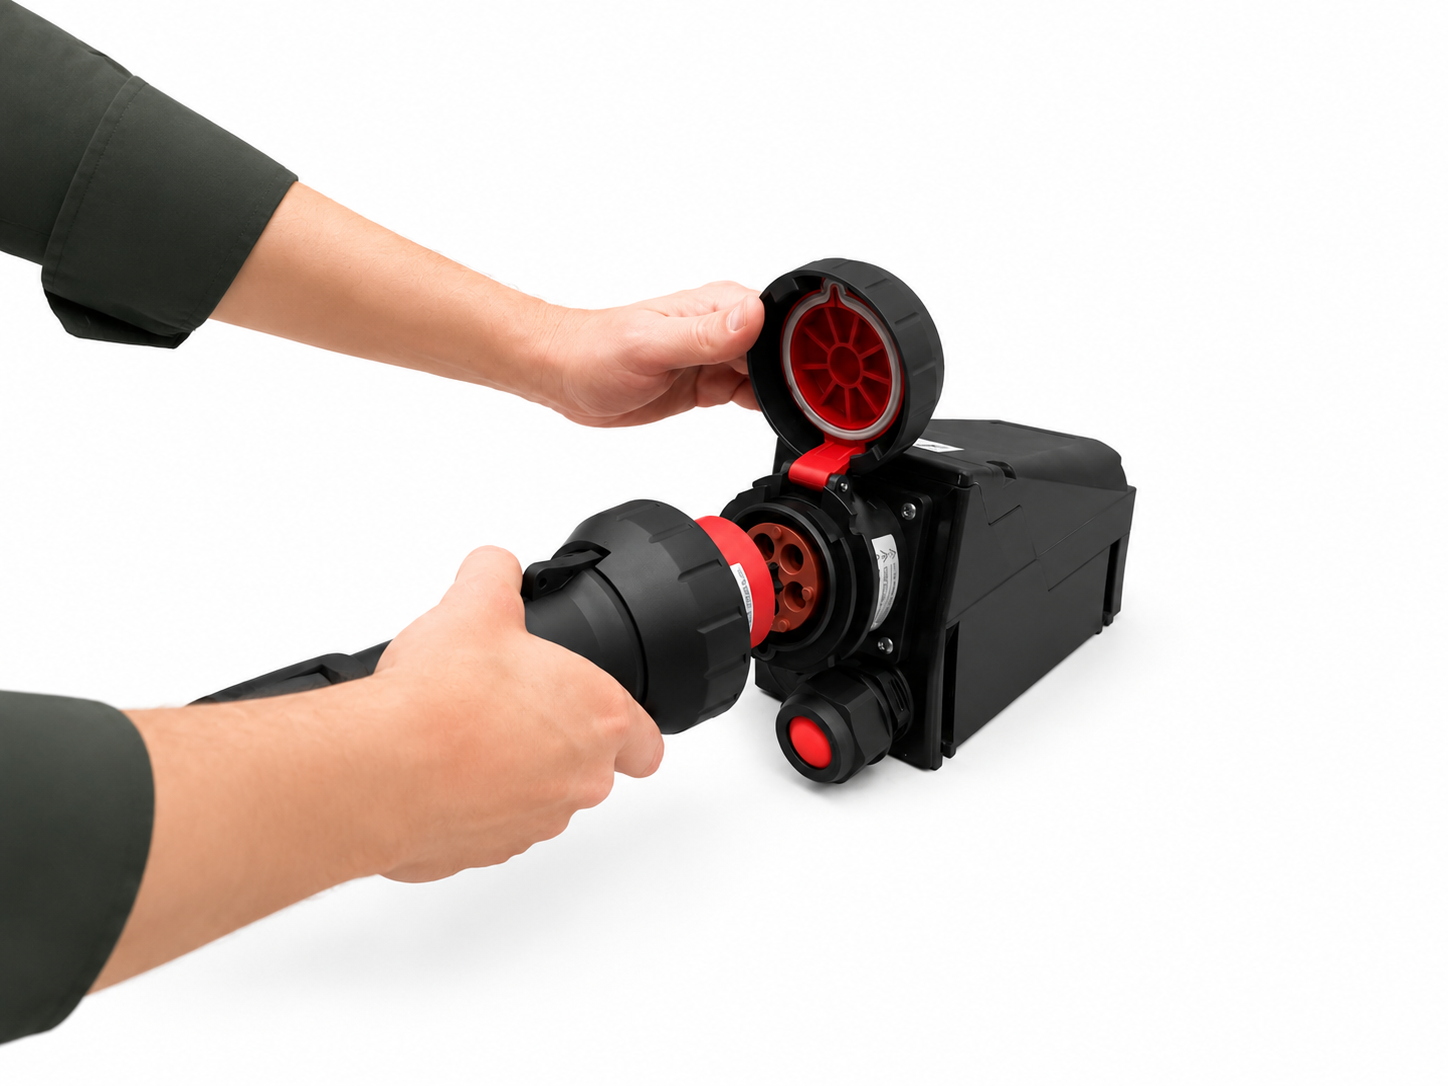
Align the plug according to the polarity markings and insert it as far as it will go. The spring-loaded design of the contact sleeves ensures constant pressure on the pins, minimises connection resistance and cleans their surfaces as they are inserted. This ensures a stable electrical connection even after repeated use of the set.
Step 3 – inserting the plug into the socket
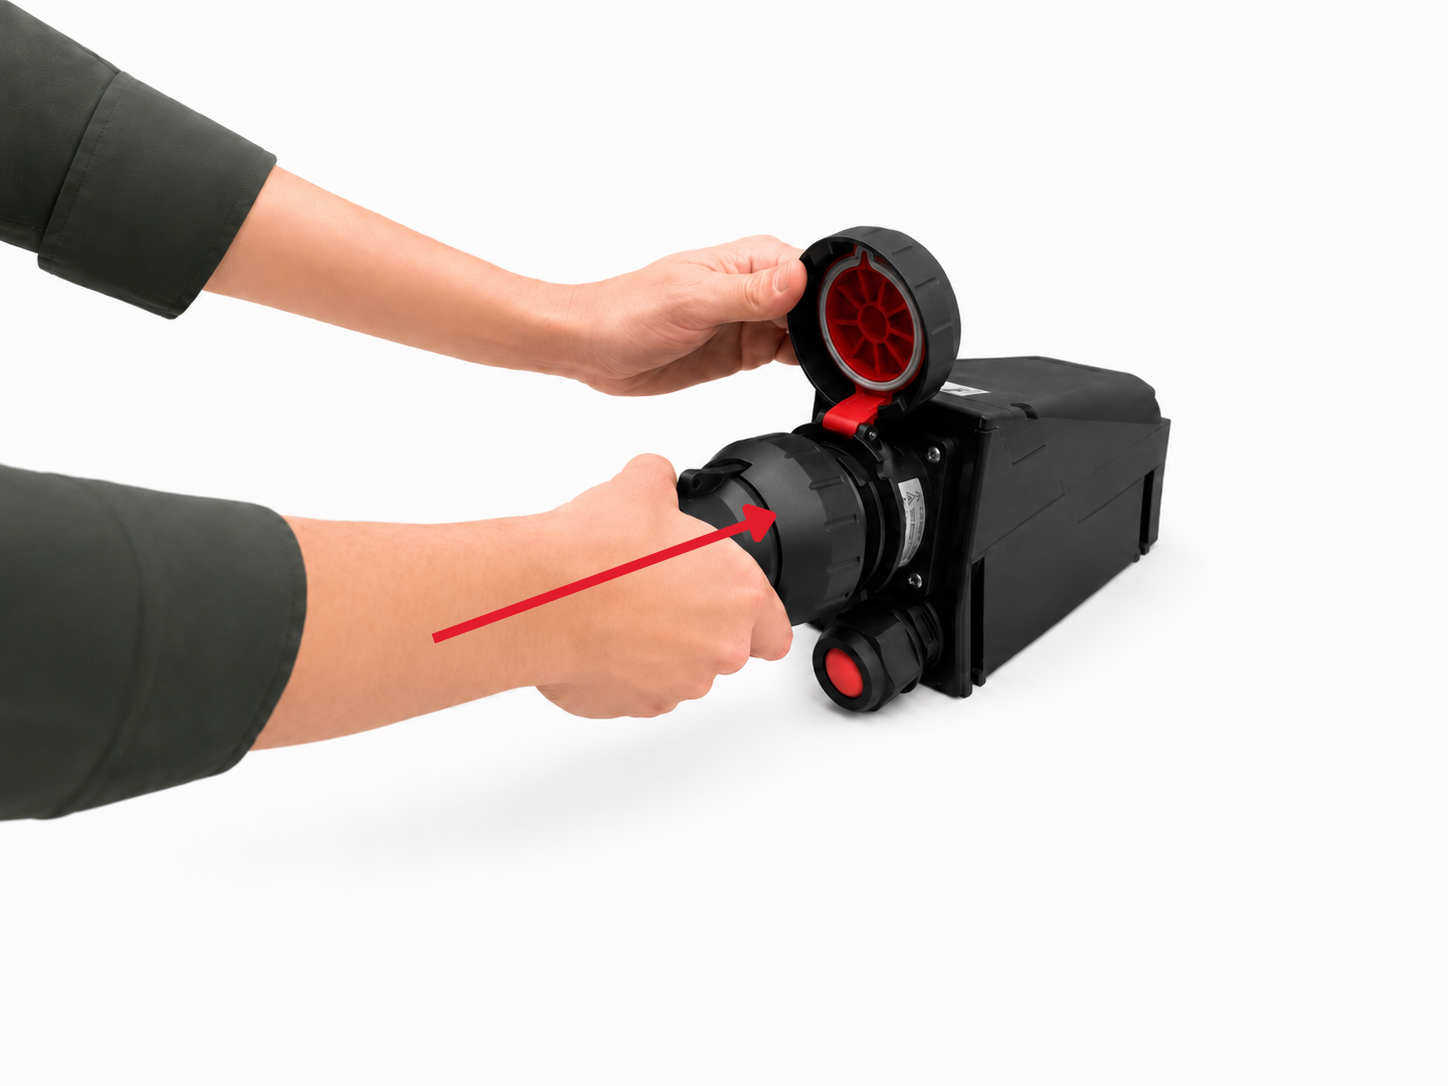
Insert the plug straight into the socket, aligning it with the connection axis. Do not twist the plug as you insert it. The plug should be inserted fully, without using excessive force.
Step 4 – Sealing and securing the joint
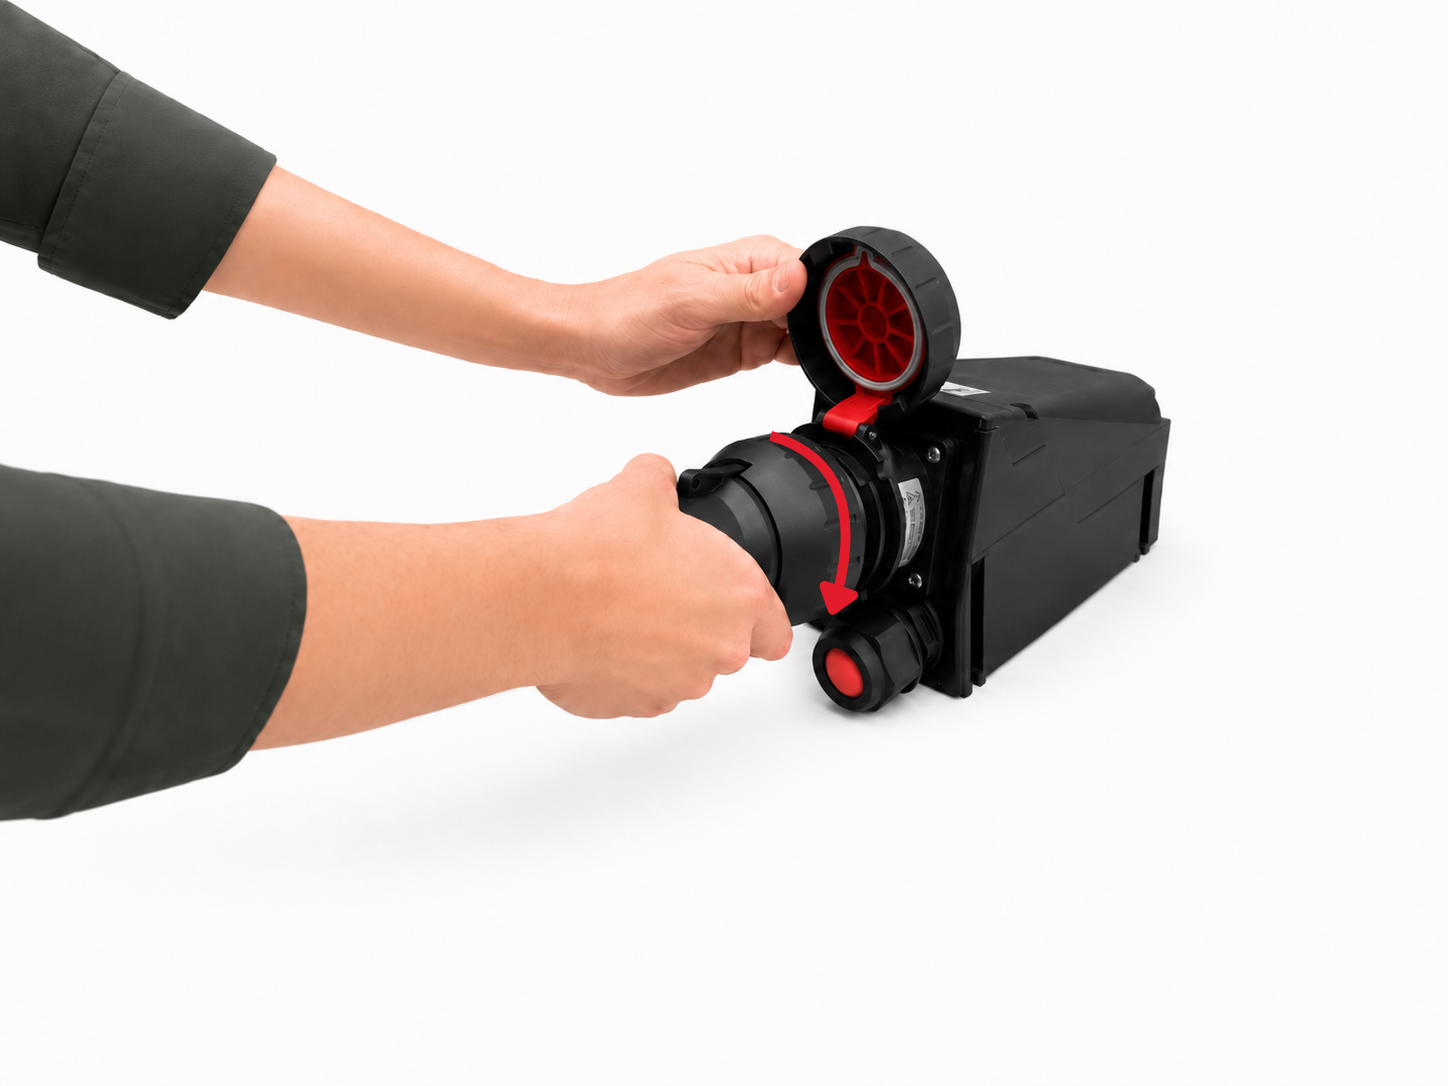
Whilst holding the plug body firmly in place, tighten the locking ring as far as it will go. This ensures the connection is dust- and water-tight to IP66 standards and provides additional protection against the plug being accidentally pulled out.
Step 5 – switching on the circuit
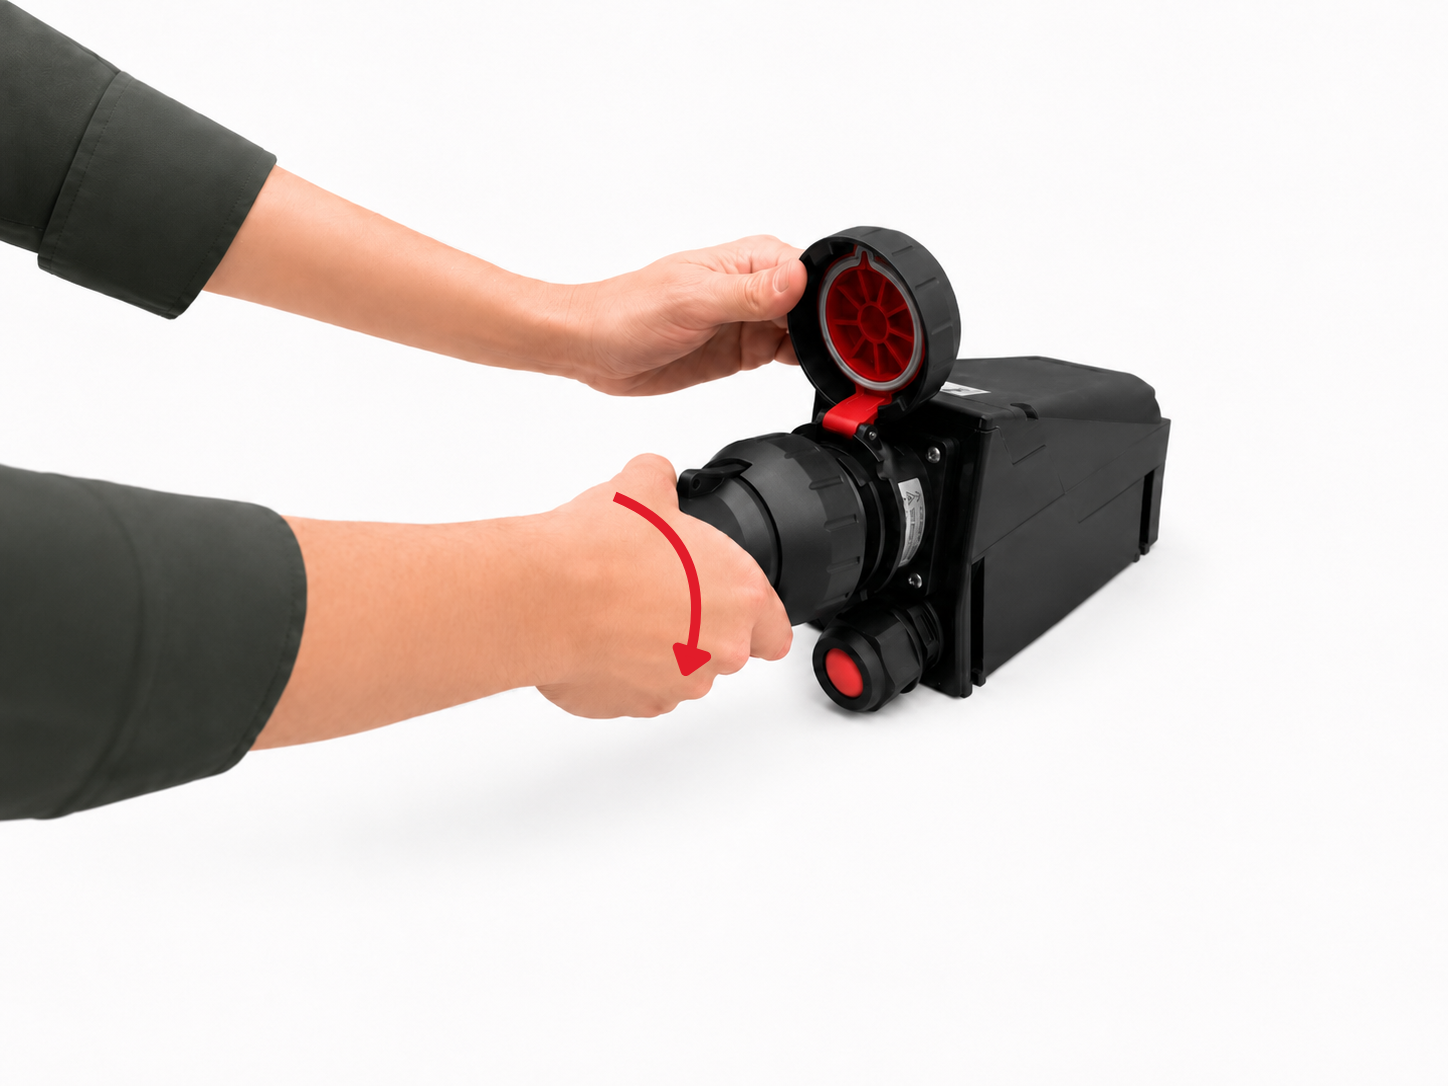
Turn the plug body in the direction indicated until you hear a distinct click. This action activates the built-in switch, which only then supplies power to the socket contacts and mechanically locks the plug in place, preventing it from being removed whilst in use.
Step 6 – operating status
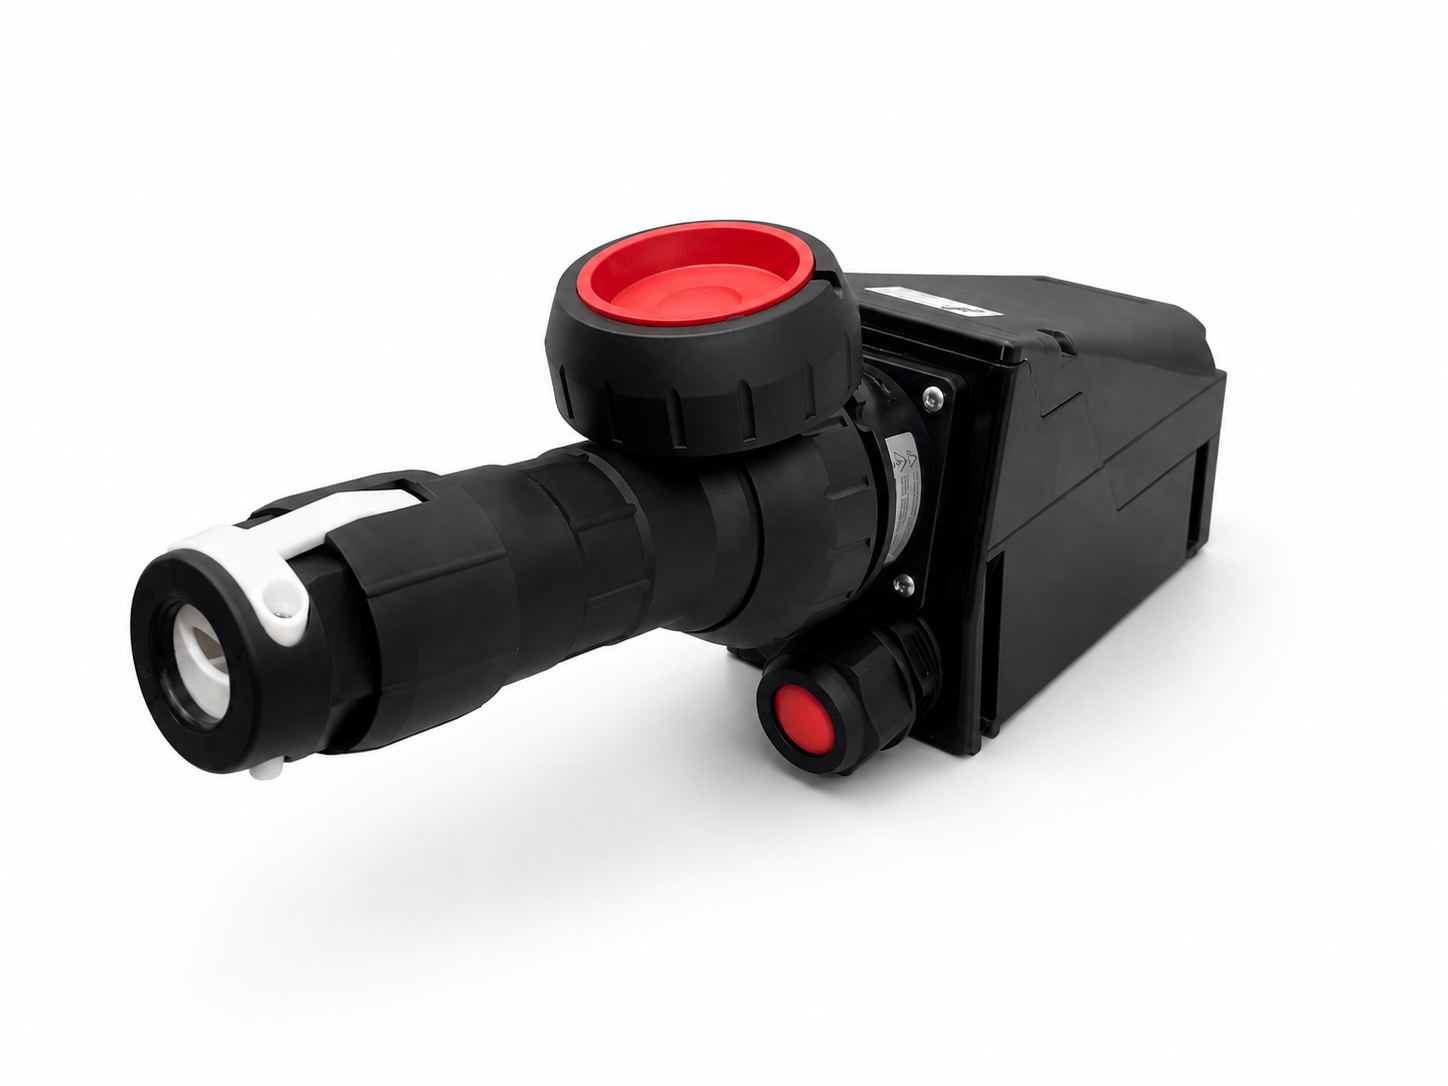
The plug should remain fully inserted, secured by the ring and in the operating position.
Do not attempt to unscrew the ring or remove the plug whilst the appliance is in use
Step 7 – switching off the circuit
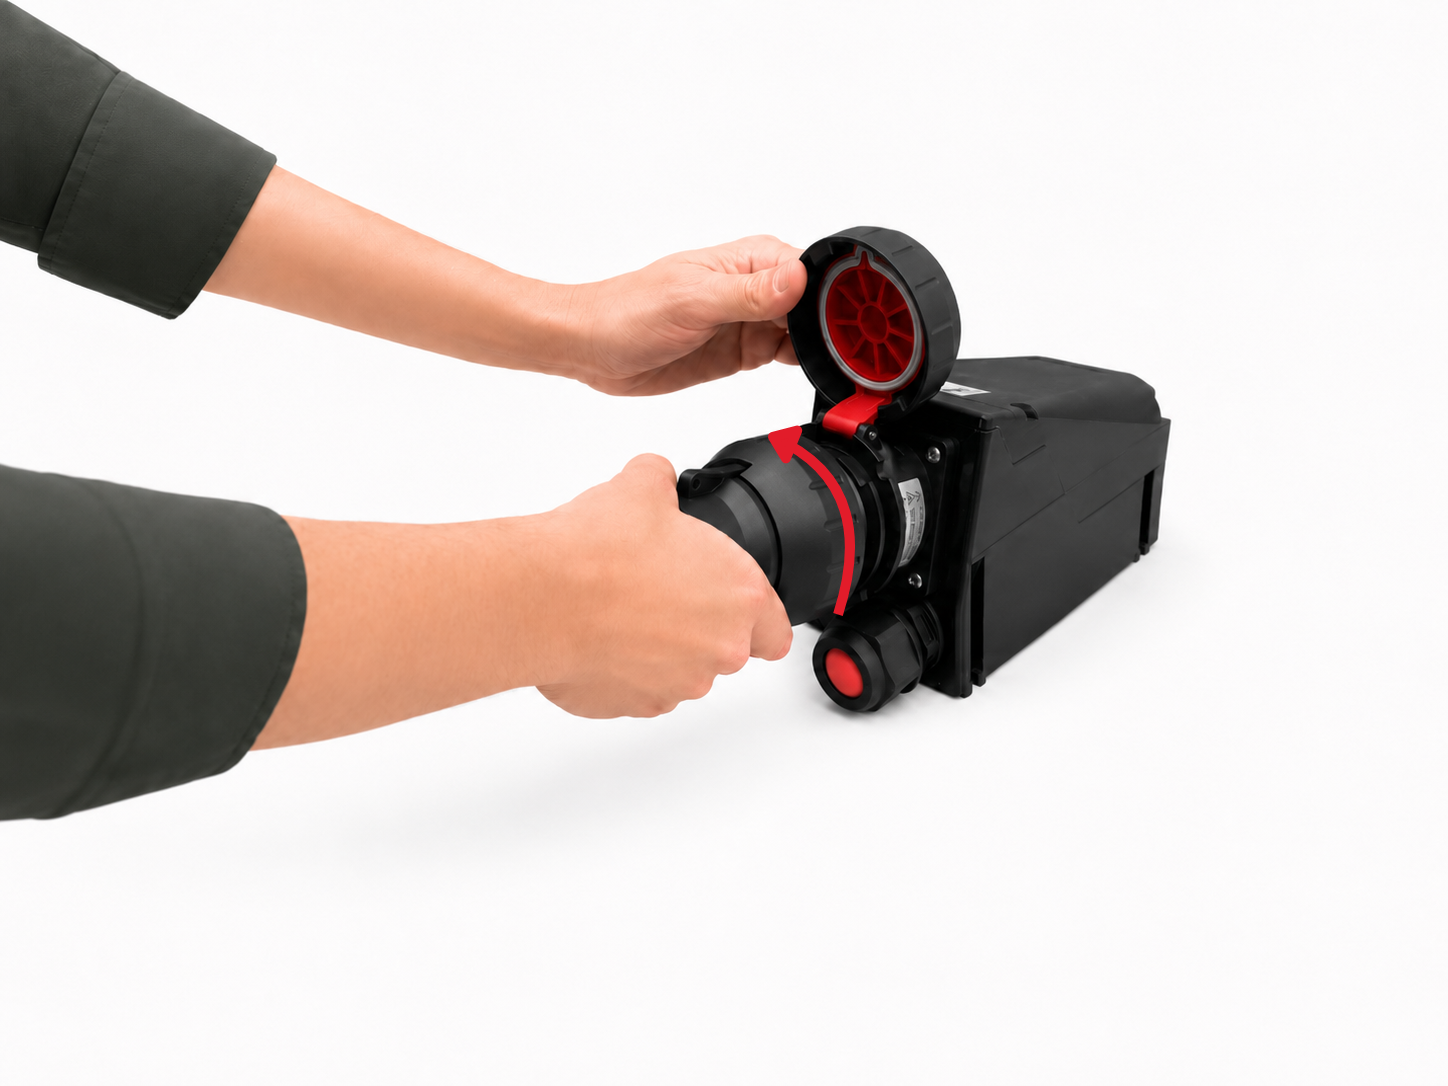
When you have finished using the appliance, first switch off the power supply. Then turn the plug body from the ‘on’ position to the ‘off’ position.
The locking ring and the socket housing should remain stationary
Step 8 – Unblocking the connection
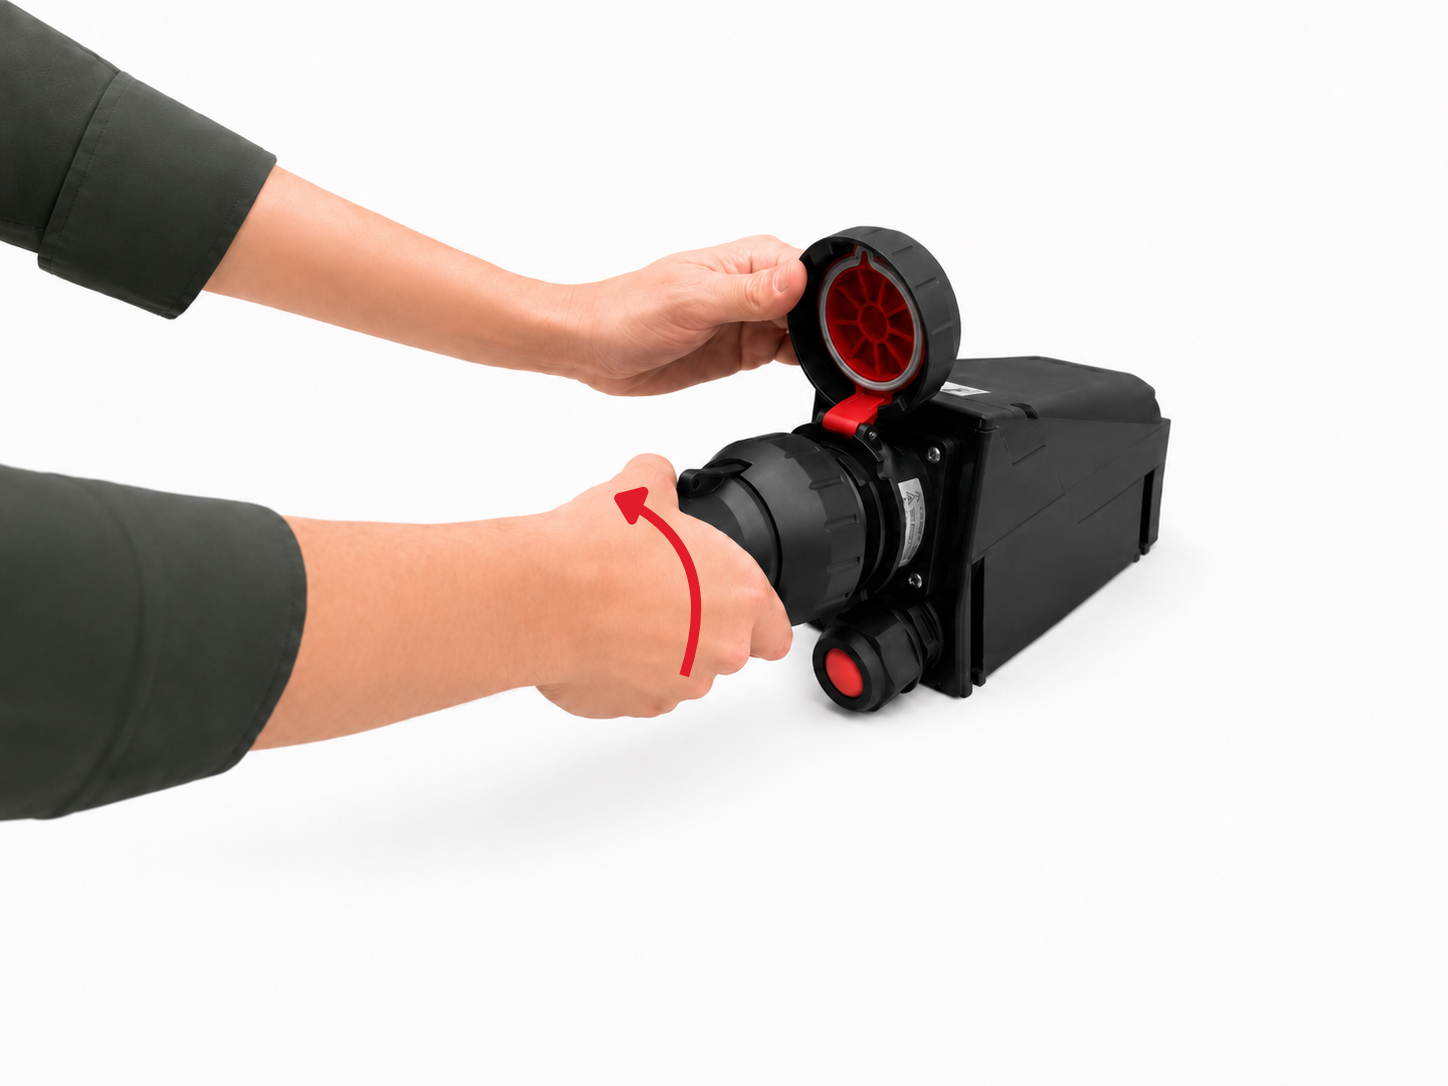
Whilst holding the plug body steady, turn the ribbed locking ring to the released position.
Do not unplug the power lead until the ring has been fully unlocked
Step 9 – removing the plug
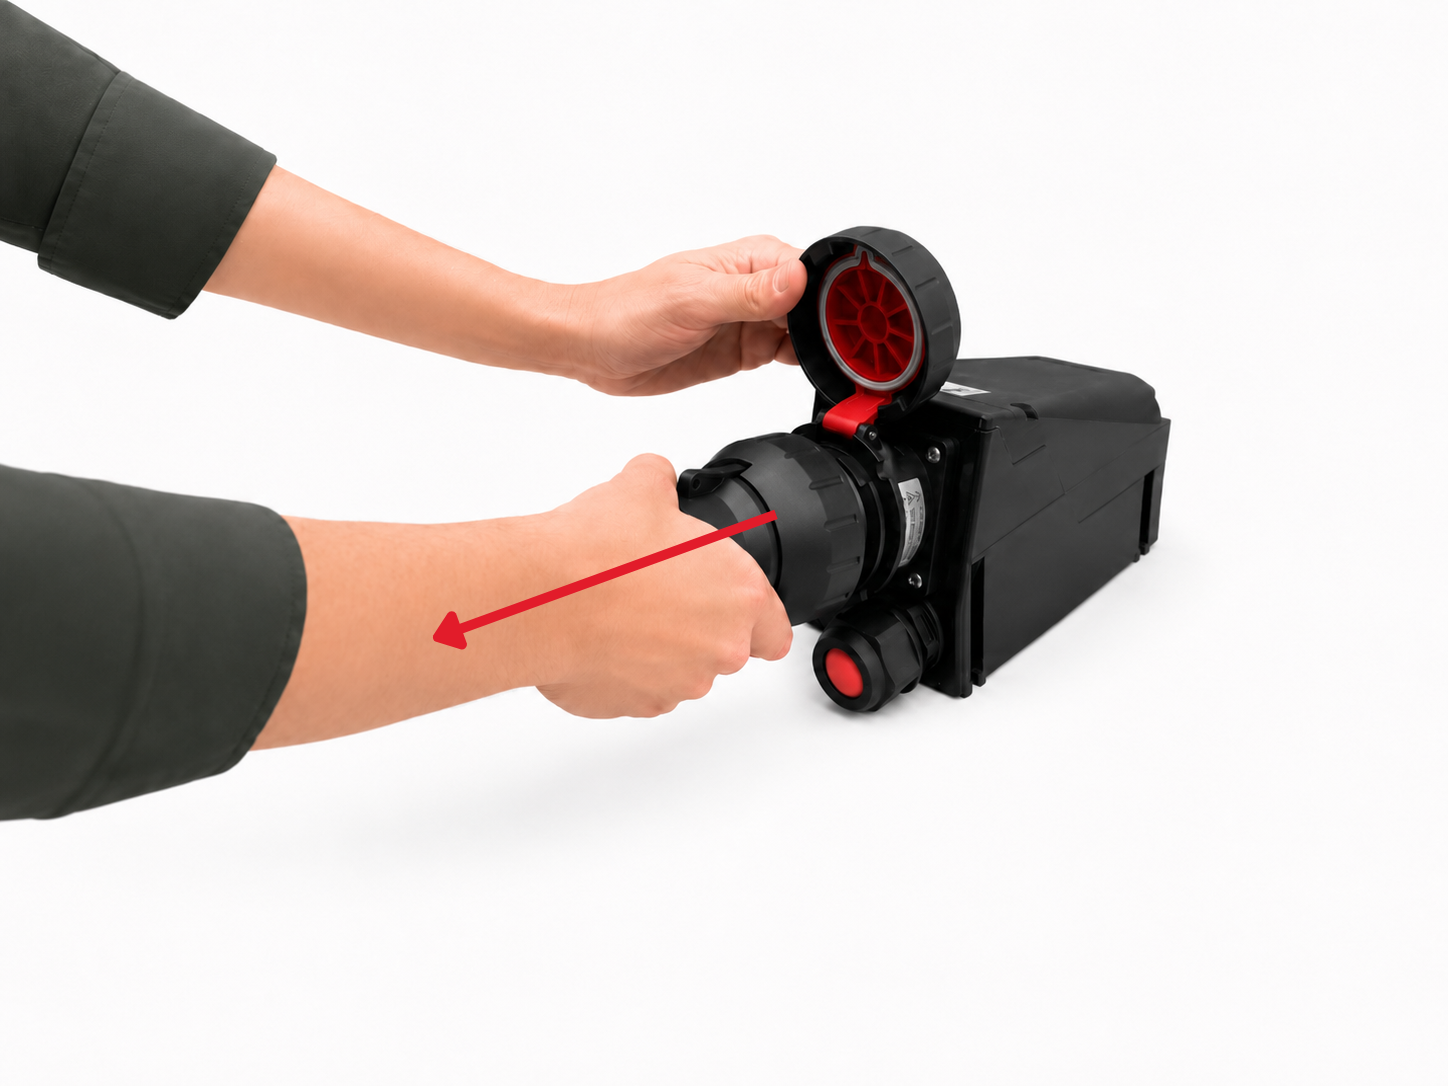
Pull the plug straight out of the socket, keeping it aligned with the connection axis. Do not twist or tilt the plug whilst removing it
Step 10 – closing the protective cover
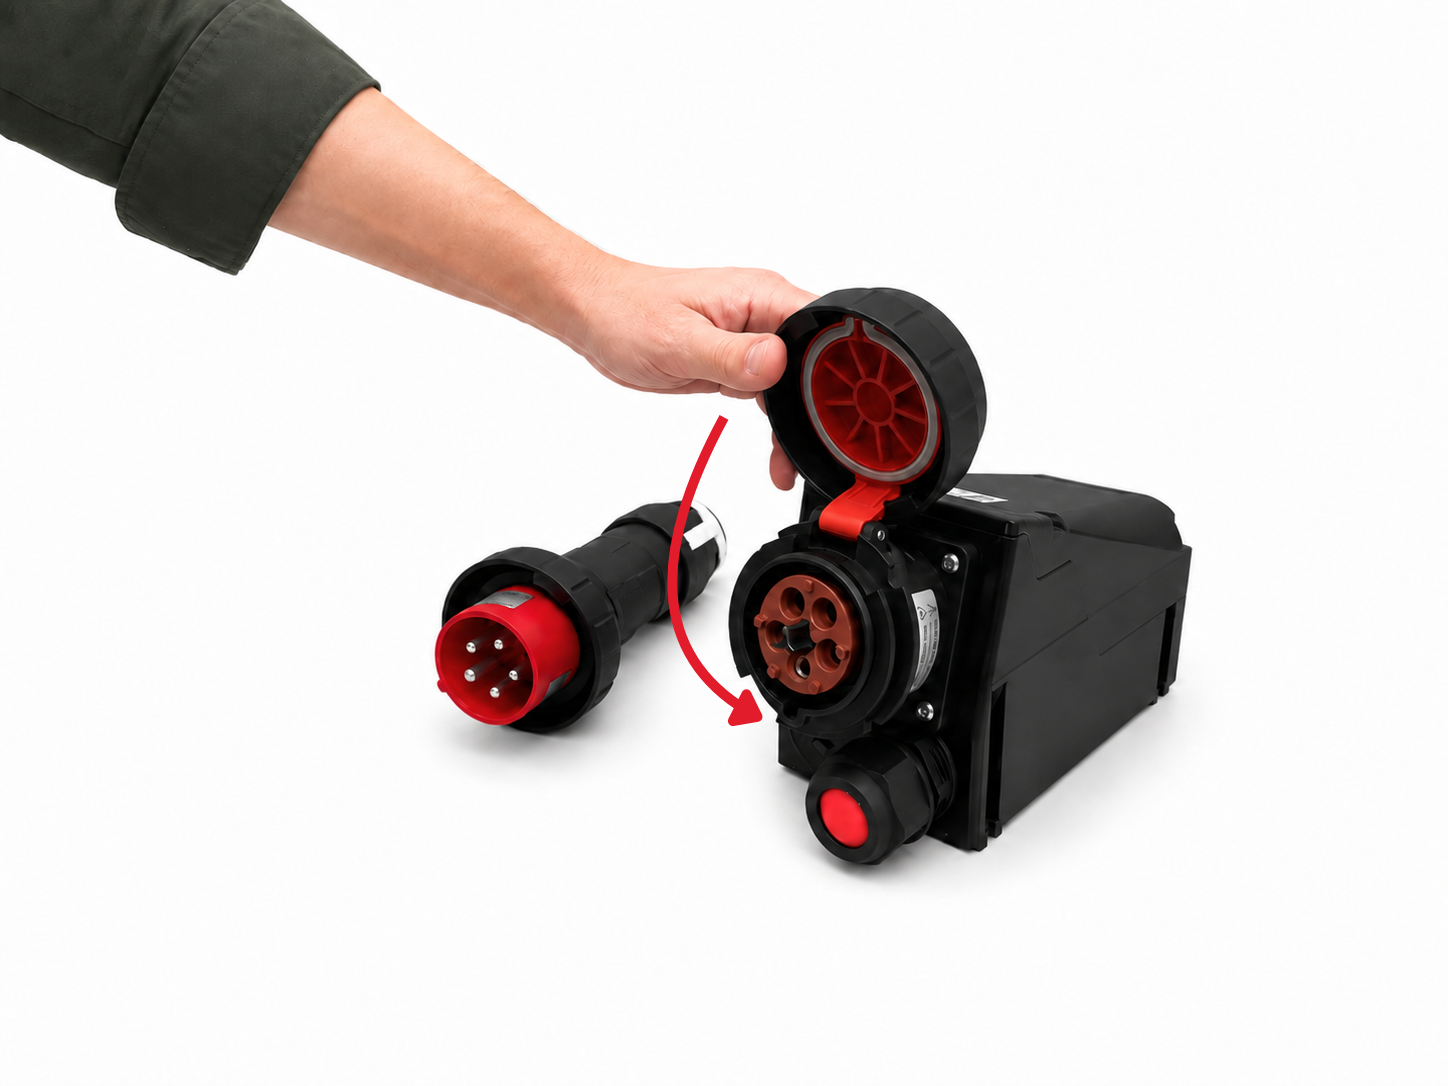
Once the plug has been completely removed, lower the protective cover and close the socket securely.
The cover protects the interior from dust and moisture when the socket is not in use.
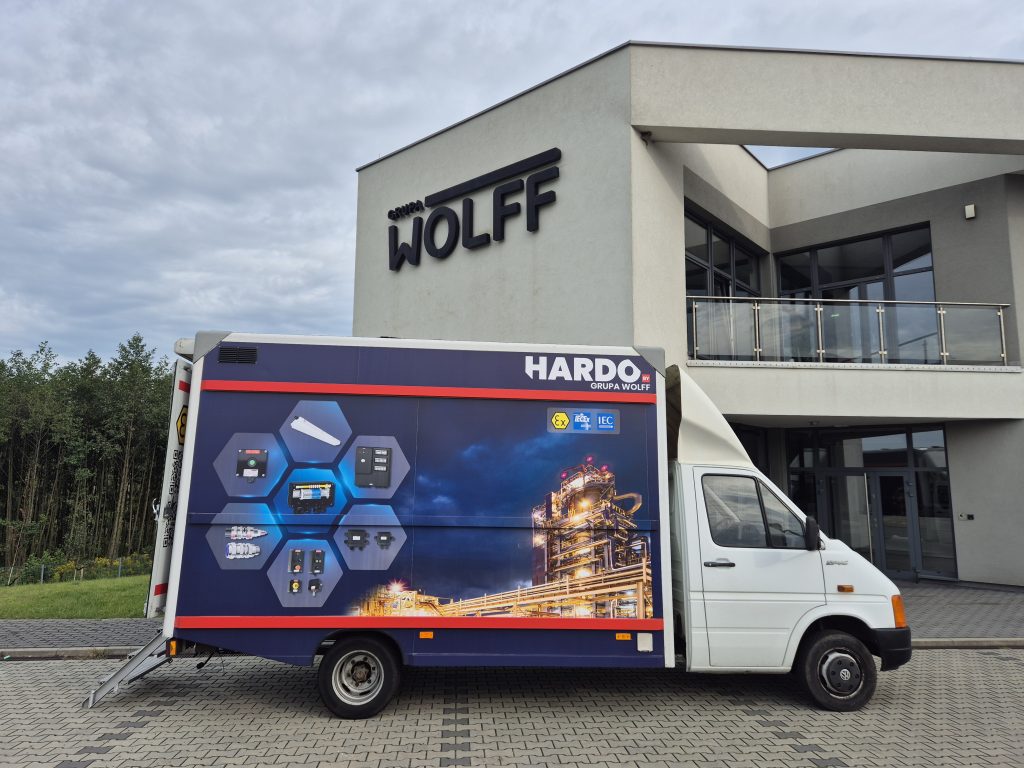
Mobile demonstration centre
Are you facing a project in the Ex sector? Do you feel that your knowledge isn’t quite up to scratch? Are you looking for a long-term supplier or considering changing your current one?
Any one of these reasons is enough to book a visit from our mobile demonstration centre.
Why do our customers book a visit from the mobile demo centre?
They want to compare the quality and functionality of HARDO’s solutions and those of other manufacturers directly at their own site
They need to train the team in the installation and selection of Ex equipment
They are working on standardising equipment within their company and are looking for the best options
They want to speed up the purchasing process by viewing and testing the equipment in person
They want to assess not only the technical specifications, but also the ergonomics and ease of use of the products
They value direct contact and the opportunity to talk to engineers
See for yourself!
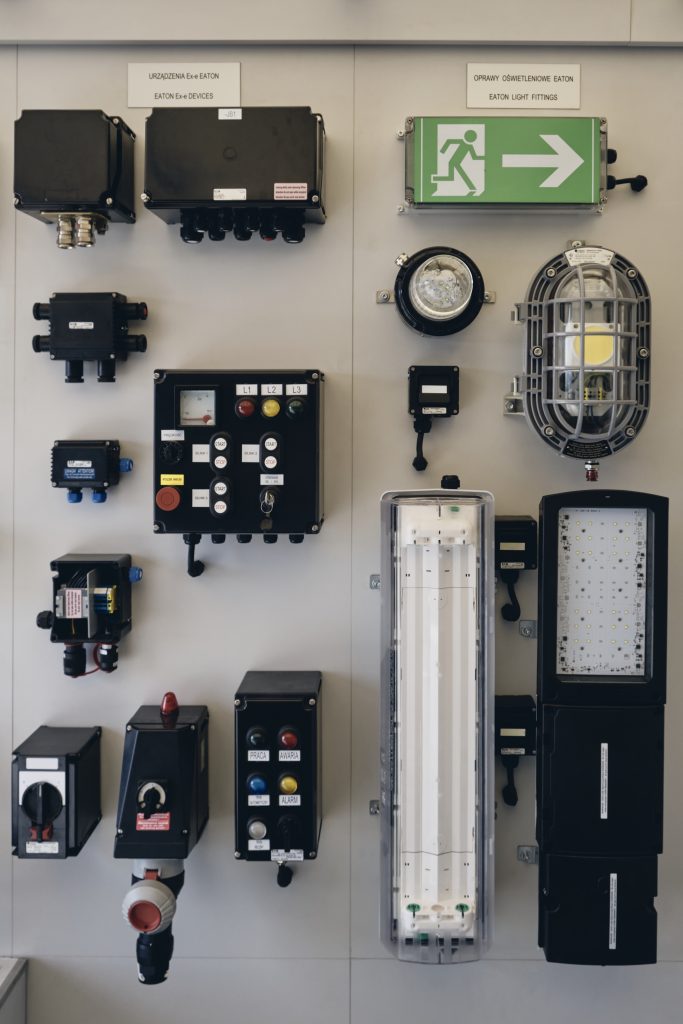
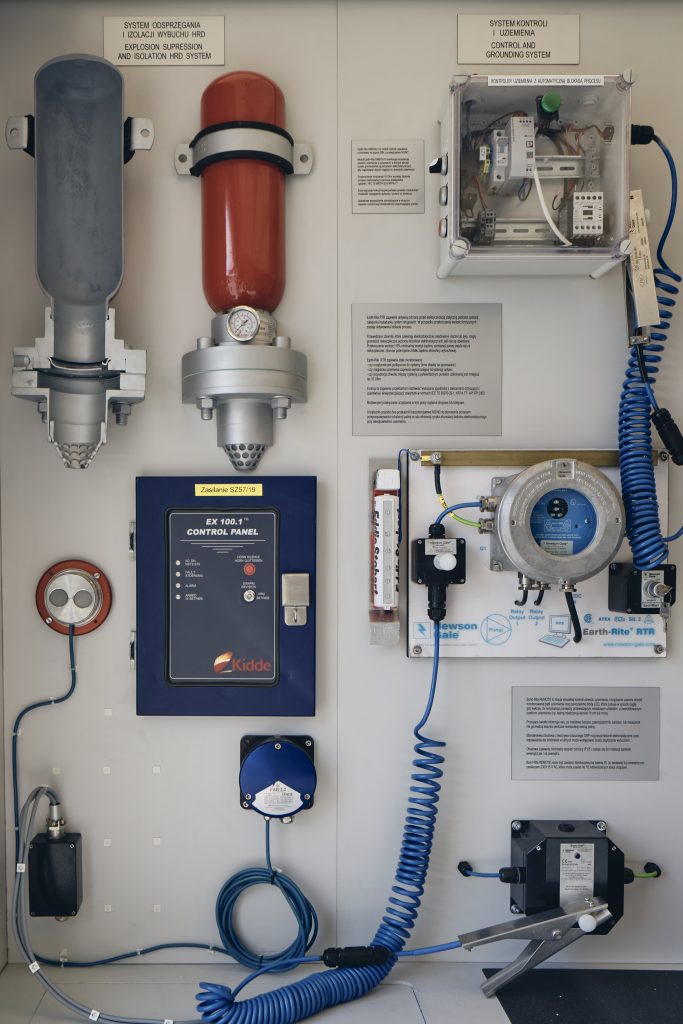
See what our products look like in real life and choose the ones you need

Which sectors do we support?
We’re here to provide the best solutions for industry. Find out how we can help your business!